Ohuhu Markers
Learn why Ohuhu markers are a fantastic budget option if you want to try out alcohol markers!
The friendly folks at Ohuhu were kind enough to send me their set of 120 dual-tip brush and chisel alcohol markers (Amazon affiliate link) to review. These markers are very similar to the costly Copic Sketch Markers that I’ve been using on a regular basis for the past 10+ years, but Ohuhu markers are only a fraction of the price. How do they compare? Read on for my in-depth analysis! I'll also show you several examples of artworks I colored in with Ohuhu brush markers.
Ohuhu Brush Markers
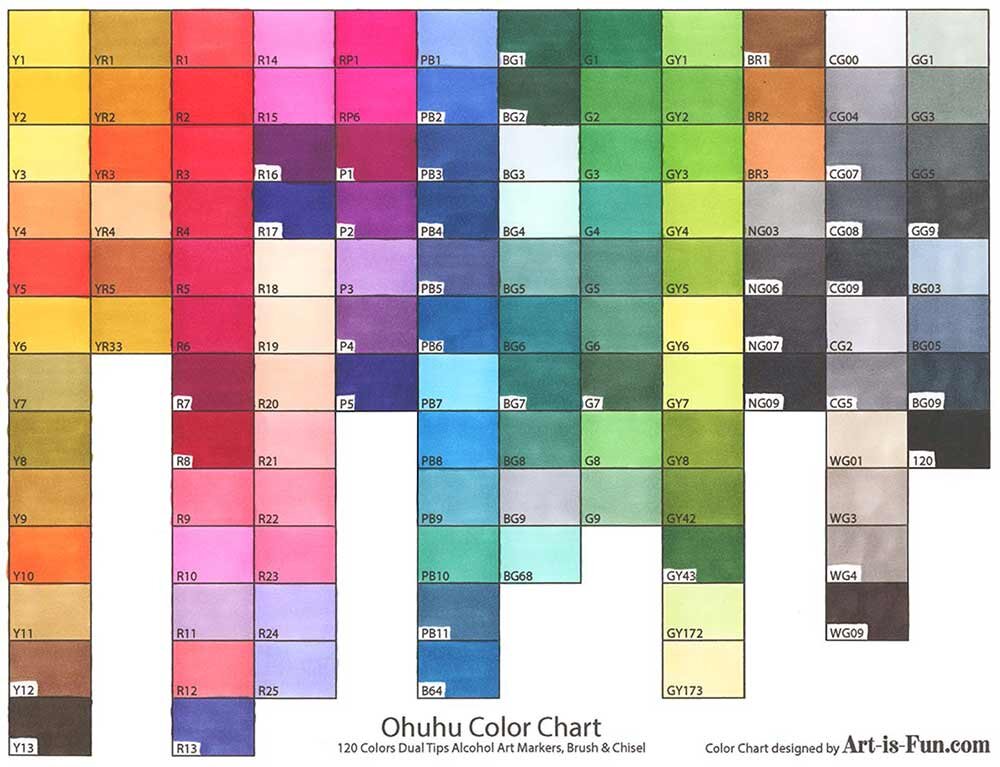
Ohuhu 120 Colors Dual Tips Alcohol Art Markers Color Chart - Click to enlarge
Ohuhu sent me their set of 120 alcohol markers, which have dual tips (just like Copic Sketch Markers), with a brush tip at one end and a chisel tip at the other end.
Update: A few months after writing this review, Ohuhu also sent me their set of 48 Pastel Markers to try, which you can read about at the end of this review!
Above is a pic of a single Ohuhu marker. The barrels of these Ohuhu markers are round and the caps on both ends have little ridges to prevent the markers from rolling all over your desk.
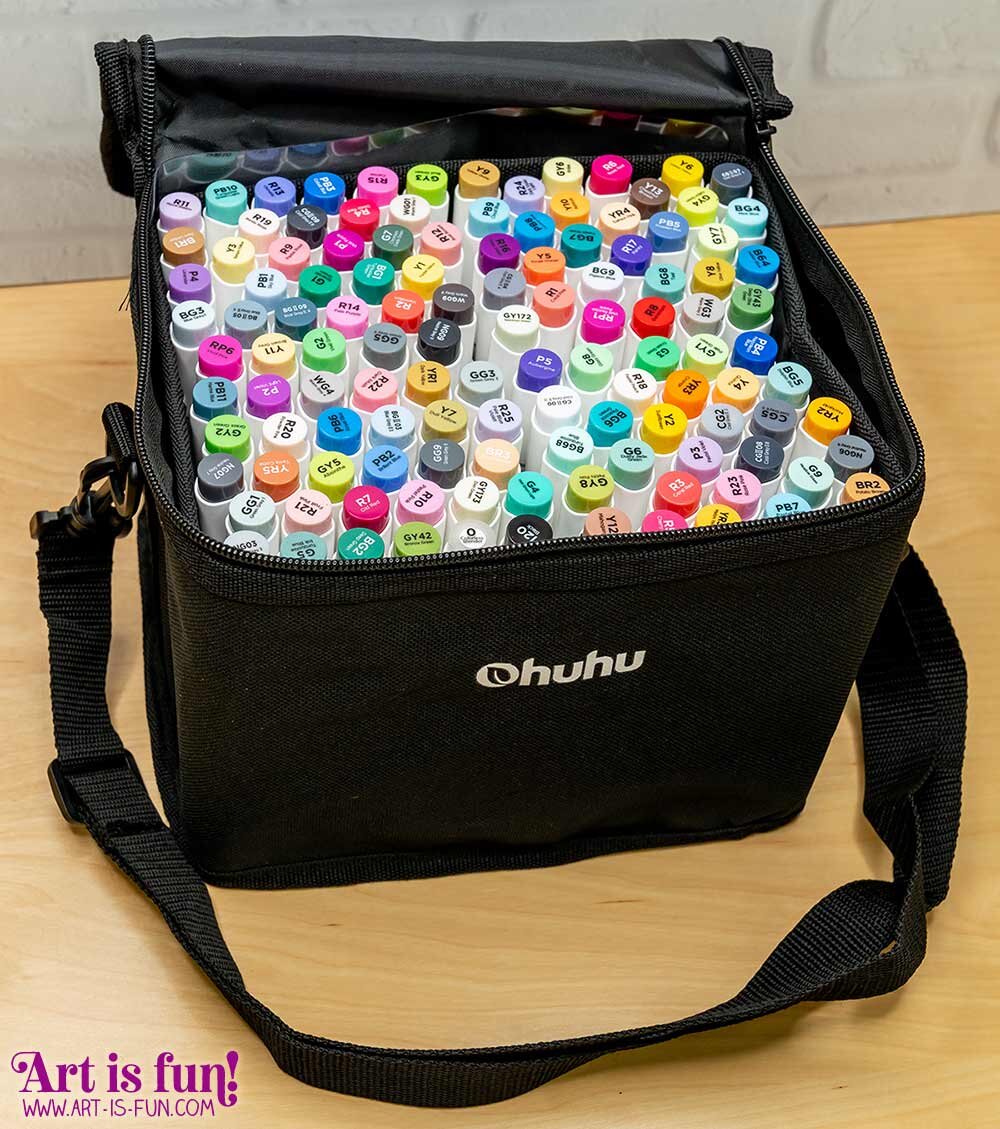
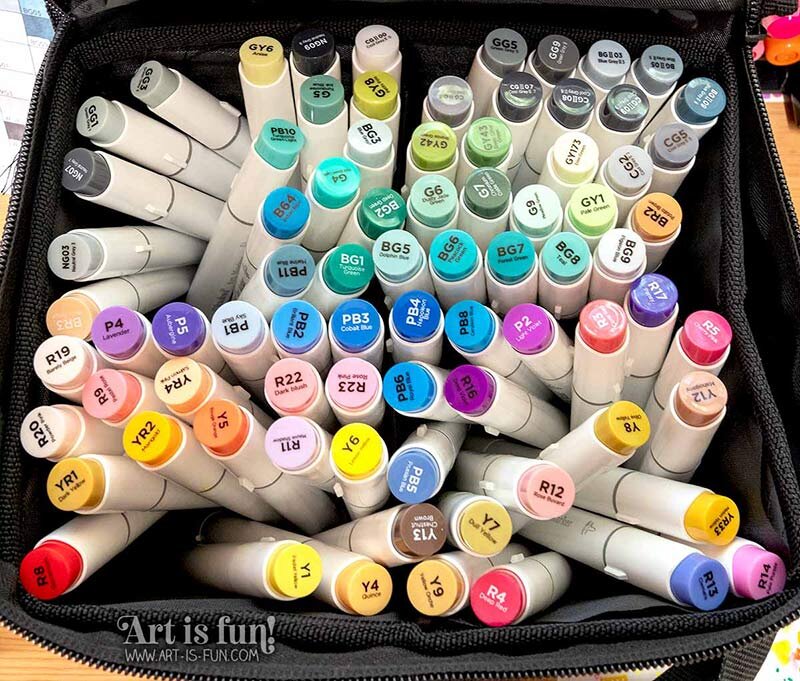
The markers come in a zippered carrying case. You can see in the photo at the top of this page that the markers are shipped with the colors randomly distributed throughout the case, so it's up to you to organize them yourself. They also include a small printed color chart (shown here) to get you familiar with the colors, which is handy, but I'd strongly suggest you create your own color chart. If your set includes a blank color chart then that’s definitely useful, but my set didn’t include one (and I couldn’t find any blank ones on their website at the time) so I had to make my own (more on that in a minute).
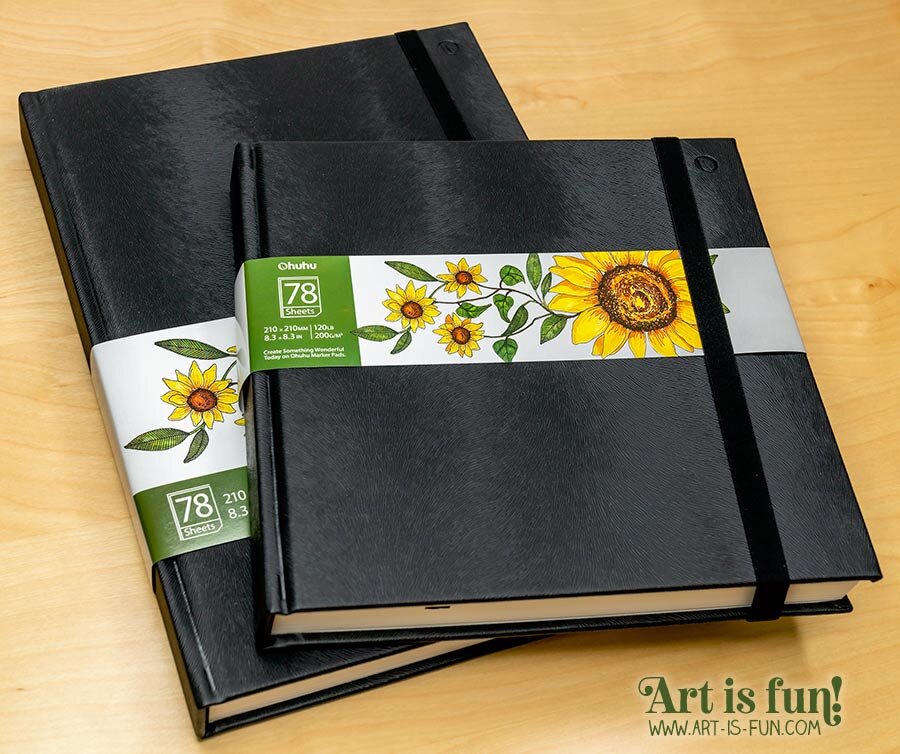
Ohuhu also sent me 2 art marker "pads", which are actually sturdy hardbound sketchbooks with perforated paper! Since they call them "art marker pads" I'll refer to them that way too throughout this article. I received a square 8.3 x 8.3 inch sketchbook and an A4-sized sketchbook (for those of you not familiar with A4, that's 8.3 x 11.7 inches). Both marker pads contain 78 sheets, which is 156 pages if you use both the front and back of the paper. The paper weight is a marvelously hefty 120lb and each overall book thickness is 1.1 inches.
Above: the two art marker pads (Amazon affiliate link) I received from Ohuhu.
Organizing your Ohuhu Art Markers
The first thing you'll want to do when you receive your markers and pads is to try them out, so dive right in! Open random colors and test them on the paper. Just have fun with it. Once you're ready, you will probably want to organize your markers and make a color chart so that you can easily find the color you're looking for in the future. In fact, I'd say that creating a color chart is essential—especially as you're getting familiar with these markers—to ensure that you're using the color you want. Sometimes the color on the cap doesn't quite match the actual color of the ink. For example, the cap on YR1 is somewhat lighter than the actual ink color.
Note: The first Ohuhu marker set I received didn’t include a blank color chart, so I created my own color chart (below). When they sent me their set of Pastel Markers, it did include a blank color chart, so it seems like Ohuhu now includes blank color charts in their marker sets, which is great! This means you can use their color chart and won’t need to create your own (unless you want to, of course)! If you can’t find the color chart when you first open the package, be sure to check the insides of the marker case, because it might be tucked deep inside back there.
If your set doesn’t include a blank color chart for you to fill out, then to organize these Ohuhu brush markers, you'll need to create your own system. The logical thing is to sort them by color. Each marker is labeled with a number and a letter. The letter refers to the color family ("Y" for yellow, "P" for purple, etc). I couldn't quite make out how the numbers relate to one another though. For example, I was expecting Y1 to be the lightest yellow but Y3 is actually lighter, as you can see in my color chart below.
Ohuhu Color Chart for 120 Dual-Tip Brush Markers
Above you can see my color chart for the Ohuhu 120 set of brush and chisel alcohol markers. This chart allows me to quickly identify which marker I'm looking for. If you like the way I've organized the colors in this chart, you can download a blank version of this chart and use it to swatch your own set!
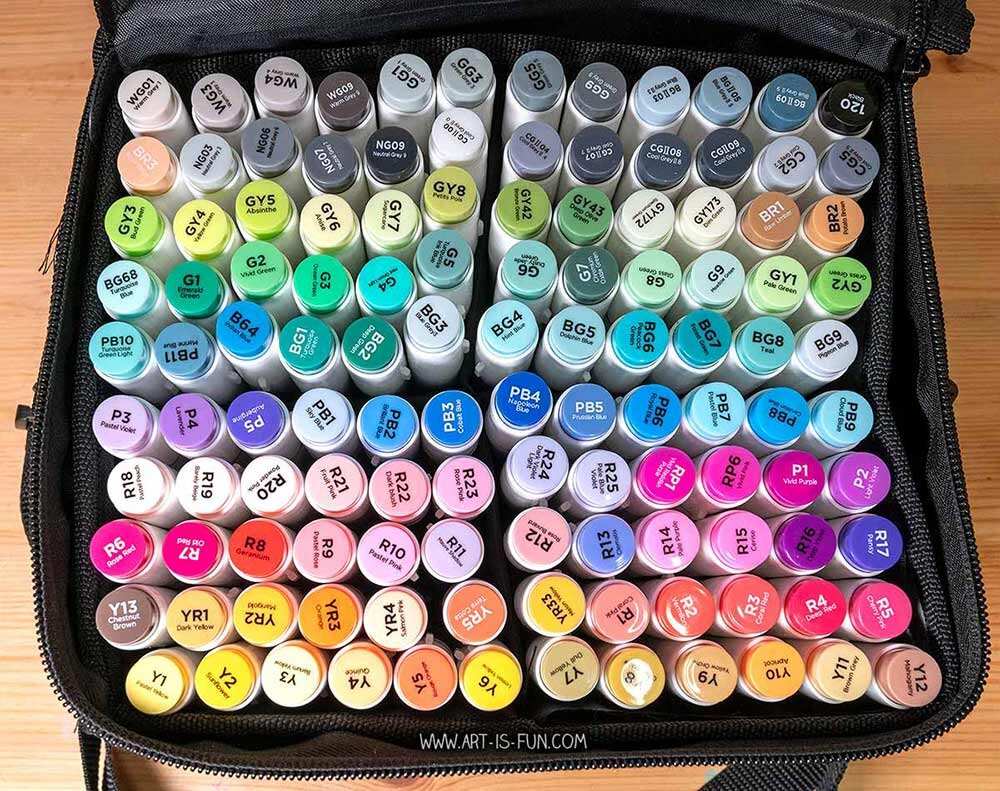
After creating the color chart, I organized the markers in the case in the same order as the chart, to make the markers easy to locate. As you can see in this pic, I started with the yellows in the front-most left corner, because for me that made the most sense. You might choose to organize your markers in a different way, however, and that's totally fine. There's no right or wrong - just do what works best for you!
Set of 120 Ohuhu Alcohol Dual-Tip Brush and Chisel Markers after I organized them by color
Ohuhu Marker Case
It's pretty cool that the Ohuhu 120 Colors Dual-Tips Alcohol Art Markers set comes with a carrying case. The case is certainly handy for carting the entire set of markers around, especially if you like to create art in different places around your house, or if you enjoy making art outside, in a library, at school or anywhere other than home!
Inside the case, there aren't individual holders for each marker - there is just a partition that separates the interior into 4 large sections that hold 30 markers each. The downside of this set-up is that if you remove a bunch of markers from a section (which you are very likely to do when you are in the flow and you need quick access to a few different color groups for blending), the remaining markers can easily get jostled around and moved out of order. This can be a tremendous pain if you like to keep your markers in meticulous order because putting the markers back into place then becomes a tedious task. I'm saying all this from experience!
After finishing a coloring session, I began attempting to put the markers back in order in the case but after several minutes it became too frustrating as the markers all shifted and flopped around, making it difficult to keep them in straight rows, let alone perfect order. Here’s a photo (above) to show you what I mean! At that point I simply dumped all of the markers out onto my desk and reinserted them into the case, one by one. All in all in took around 25 minutes just to get the markers organized again, which, if you're a professional artist working on a deadline, is frankly a waste of precious time. The whole point of being organized is so you can work efficiently, but this carrying case doesn't facilitate that kind of workflow.
With that in mind, the carrying case could certainly be improved by the addition of individual partitions for each marker. However, since the case is included in the overall price of the markers, it's still extremely good value just for the portability it provides - you just need to be aware that taking a bunch of markers out can result in a certain degree of chaos in the case.
The Ohuhu colorless blender that comes included
It's kind of a side note, but it's also worth mentioning that this Ohuhu marker set is a collection of 120 markers plus a colorless blender. To fit the markers evenly in the case requires each compartment to contain 5 rows of 6 markers across, for a total of 30 markers per compartment. The extra colorless blender throws off this alignment so if you try to squeeze it in, it will throw off the alignment of the markers, making it easier for them to shuffle out of place. Instead, I rest the colorless blender on top of the markers (where it fits easily with room to spare) and then zip it up for transport.
Colors in the Ohuhu 120 Brush Marker Set
Overall this is a great range of colors that will be more than adequate for most colorists and hobbyists, with a few caveats. Some colors are extremely similar - for example, R5 is only the tiniest smidgeon lighter than R6, and R4 seems the tiniest bit more red than R5, which is slightly more fuchsia.
Plus, the 120 set doesn't include any true skin tones, which was a bummer - you have to purchase those separately in a set of 24 skin tone colors (Amazon affiliate link).
A coloring page from my set of printable Enchanted Faces Coloring Pages, colored in with Ohuhu alcohol markers
The closest colors you’ll find to pale skin tones in this set of 120 markers is R18, R19, R20 and R21, which I used to color in this face. For darker skin tones you can try some of the darker yellows, yellow-oranges and browns, but none of them look as natural as skin colors as the 24 colors offered in the aforementioned skin tones set.
Also, I wish there was a brighter lemon yellow, and more light, bright blues. I also wish there were more Neutral Greys and Warm Greys so that it would be easier to create smooth blended gradients. For instance, there are 3 light Warm Greys and 1 dark one, so it would be nice to have some medium-dark Warm Greys as well to create a smoother transition from light to dark Warm Grey.
Other than that, this is certainly a wonderful range of colors for beginners - definitely more than enough to get you started!
UPDATE: Ohuhu has now created a set of 48 Pastel Markers that fills in some of those color gaps mentioned above!
Alcohol Marker Videos
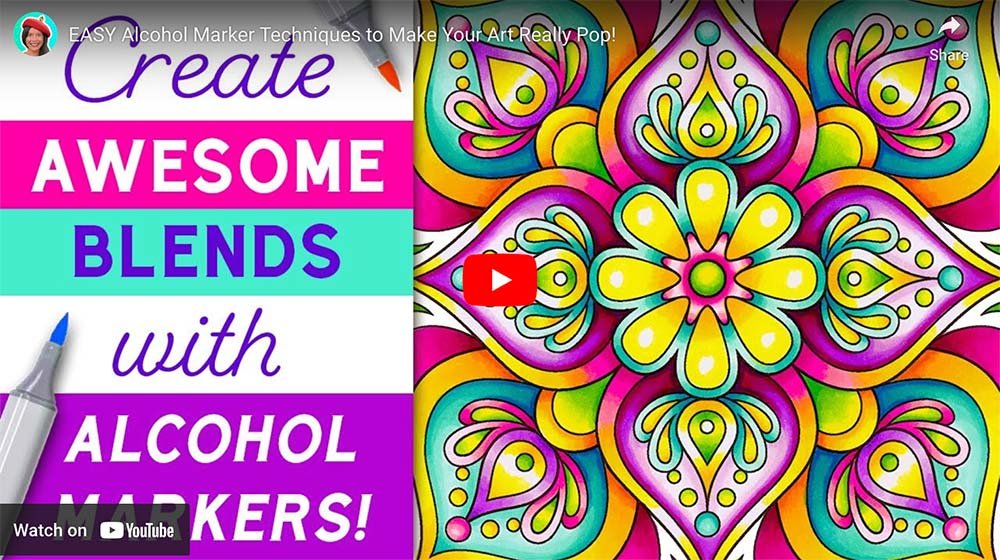
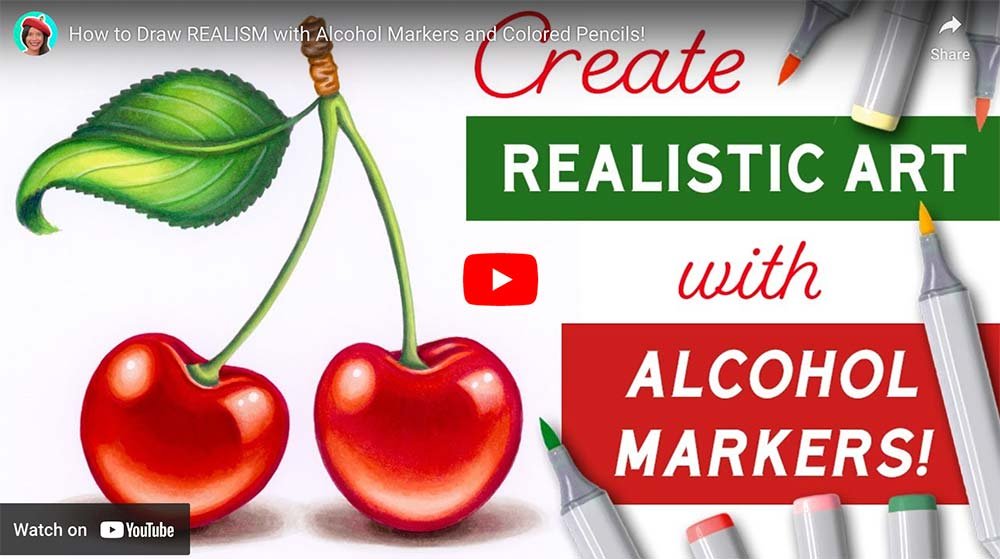
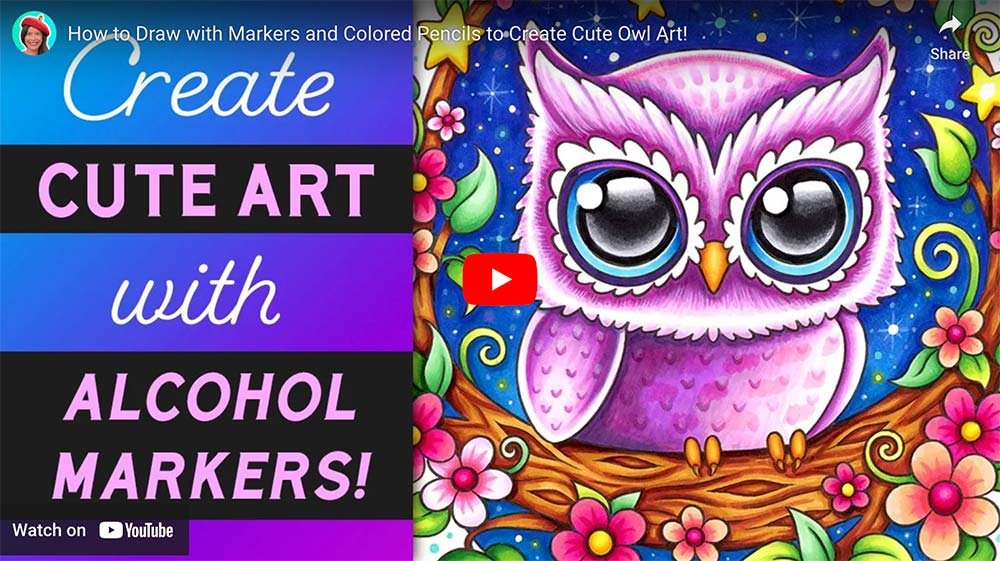
If you’re new to alcohol markers, check out my YouTube channel for videos on how to use alcohol markers! Here are some videos to get you started with alcohol markers:
For your convenience, I’ve compiled all of my alcohol marker videos into an Alcohol Markers Playlist.
If you enjoy my videos, be sure to subscribe to my channel so that you never miss a thing! 😃
Blending Ohuhu Alcohol Markers
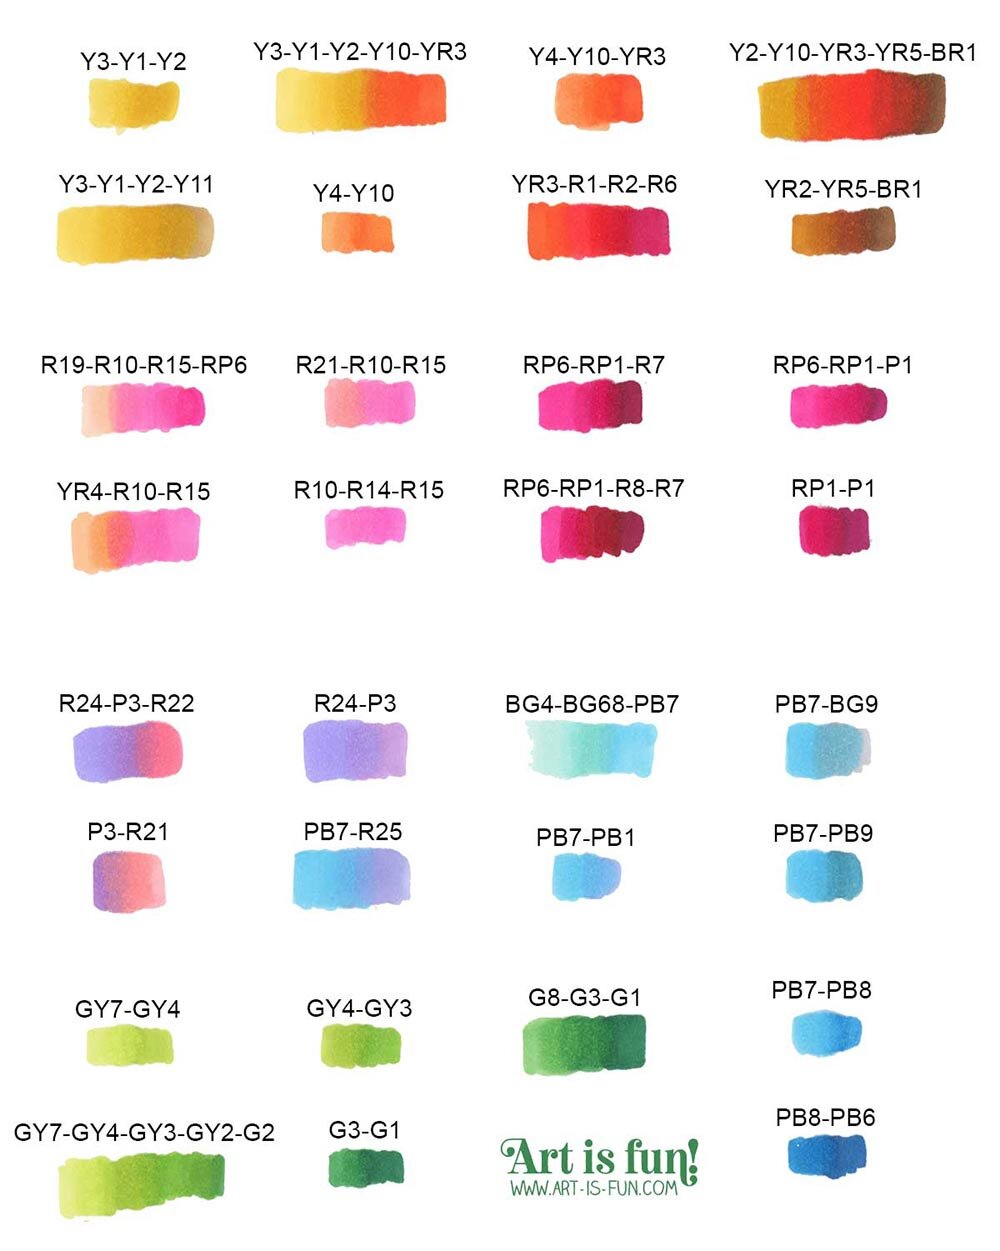
Alcohol markers are made for blending, and in time you’ll memorize which colors go together to create just the blend you’re looking for. Until then, it’s incredibly handy to create a color chart for all your favorite blends, noting down which markers you used to create that blend. Below you can see some of my favorite blends that I use frequently when coloring with this set of 120 Ohuhu brush markers:
Sample color blends for Ohuhu 120 Alcohol Brush and Chisel Markers Set
Learn How to Use Your Markers
If you'd like to learn more alcohol marker blending techniques, check out my Ultimate Guide to Using Alcohol Markers, where I take you step-by-step through the fundamentals of blending, and then demonstrate advanced techniques so that you can create any genre of art with your alcohol markers!
Quality of Ohuhu Brush Markers
Straight out of the package, the ink load of these markers is really great. Each marker I tried is well-saturated with ink, so I had no problems with dried-out or streaky markers.
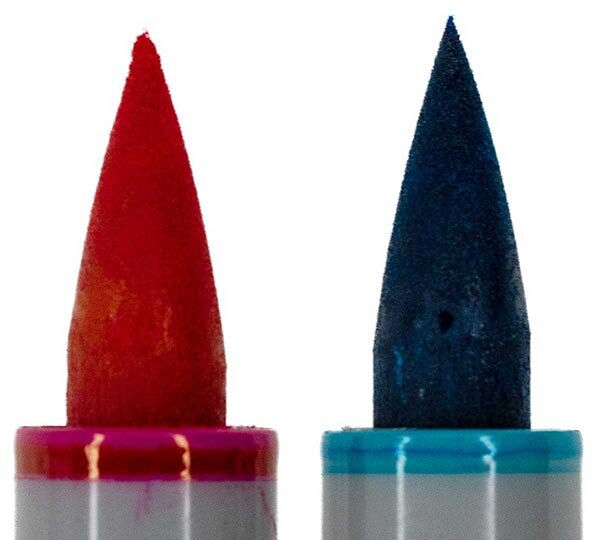
A side-by-side comparison showing an Ohuhu alcohol brush marker with a frayed tip (left) after just 1 week of frequent use, compared with an unfrayed Ohuhu tip (right)
It's worth noting that if you happen to receive any markers that seem dried out, they've included a pamphlet in the package that says they'll issue a refund if the product doesn't meet your expectations, and that if there are any problems, they'll send you a free replacement. Good to know!
When I create art with markers I almost always use the brush tip and rarely use the chisel tip. This means that the brush tips get a lot of use, so it's important that they retain their points. For the most part, the Ohuhu brush tips held up well after a few weeks of normal use, but I notice that the colors I used heavily did start to experience some fraying in the tip. Here's an example that shows a blue marker with a perfect pointy tip next to a fuchsia marker that I used a lot, which resulted in a slightly frayed tip. The fraying might not seem like too much of a big deal in this pic, but when you're trying to color in really tight spaces, even a little bit of fraying can make it difficult or impossible to accurately lay down the color precisely where you want it.
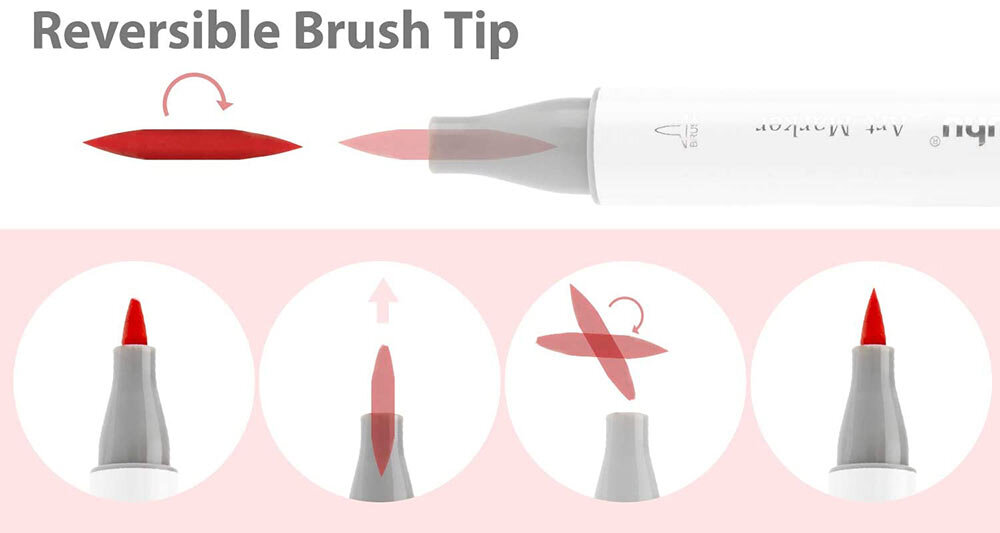
After I wrote this review, the kind people at Ohuhu sent me the graphic below to let me know that the brush tip is reversible! You can remove the tip from the barrel and reinsert it the other way round, which gives you a fresh new tip. Good to know!
UPDATE: You can now purchase Ohuhu replacement brush nibs (Amazon affiliate link)! They come in a set of 8 brush nibs, which are reversible, just like the graphic shows below. This means you essentially get 16 nibs, along with a little storage box and a set of tweezers for removing the nibs. Very handy!
Because the Ohuhu markers are a lower-cost alternative to premium markers, like Copics, they’ll likely never be able to fully match the quality of Copics while keeping the price so low. Still, Ohuhu has done an excellent job maximizing quality within the limitations of such an affordable price point! Plus, they continually do research and development on their products, with the aim of improving the overall quality and user experience.
Performance of Ohuhu Brush Markers
So far I've tested the Ohuhu Markers on four different surfaces:
- Ohuhu art marker paper (Amazon affiliate link)
- X-Press It Blending Card (Blick affiliate link)
- Neenah Exact Index 110lb Bright White Cardstock (my favorite cardstock for printing my printable coloring pages)
- A page from one of my published coloring books
I'm happy to report that the Ohuhu markers worked splendidly on all four surfaces!
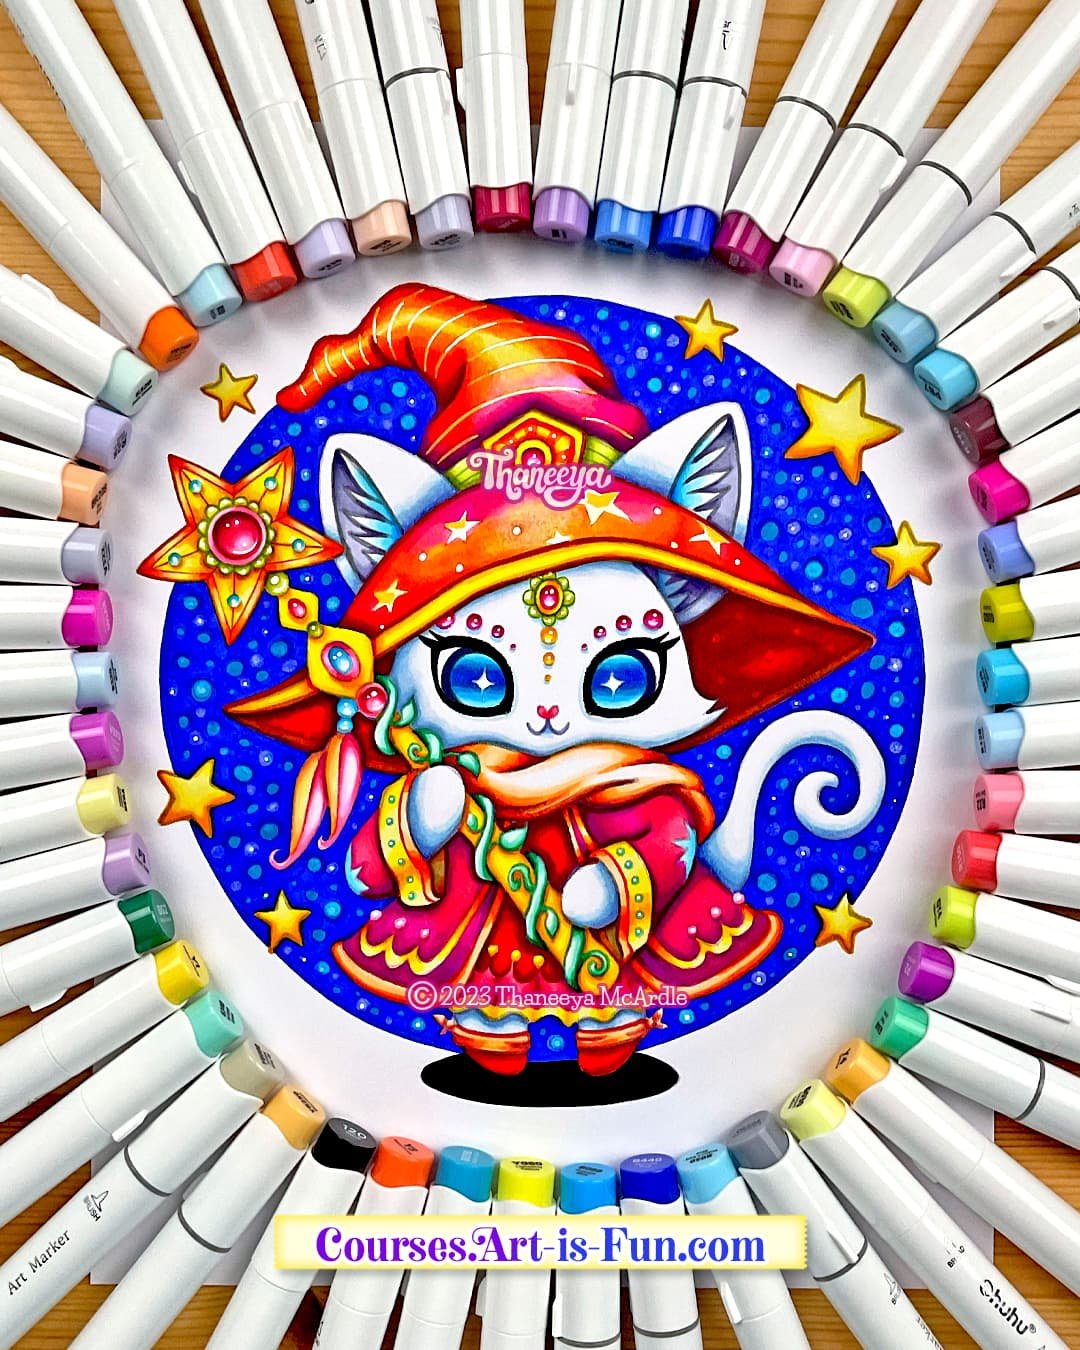
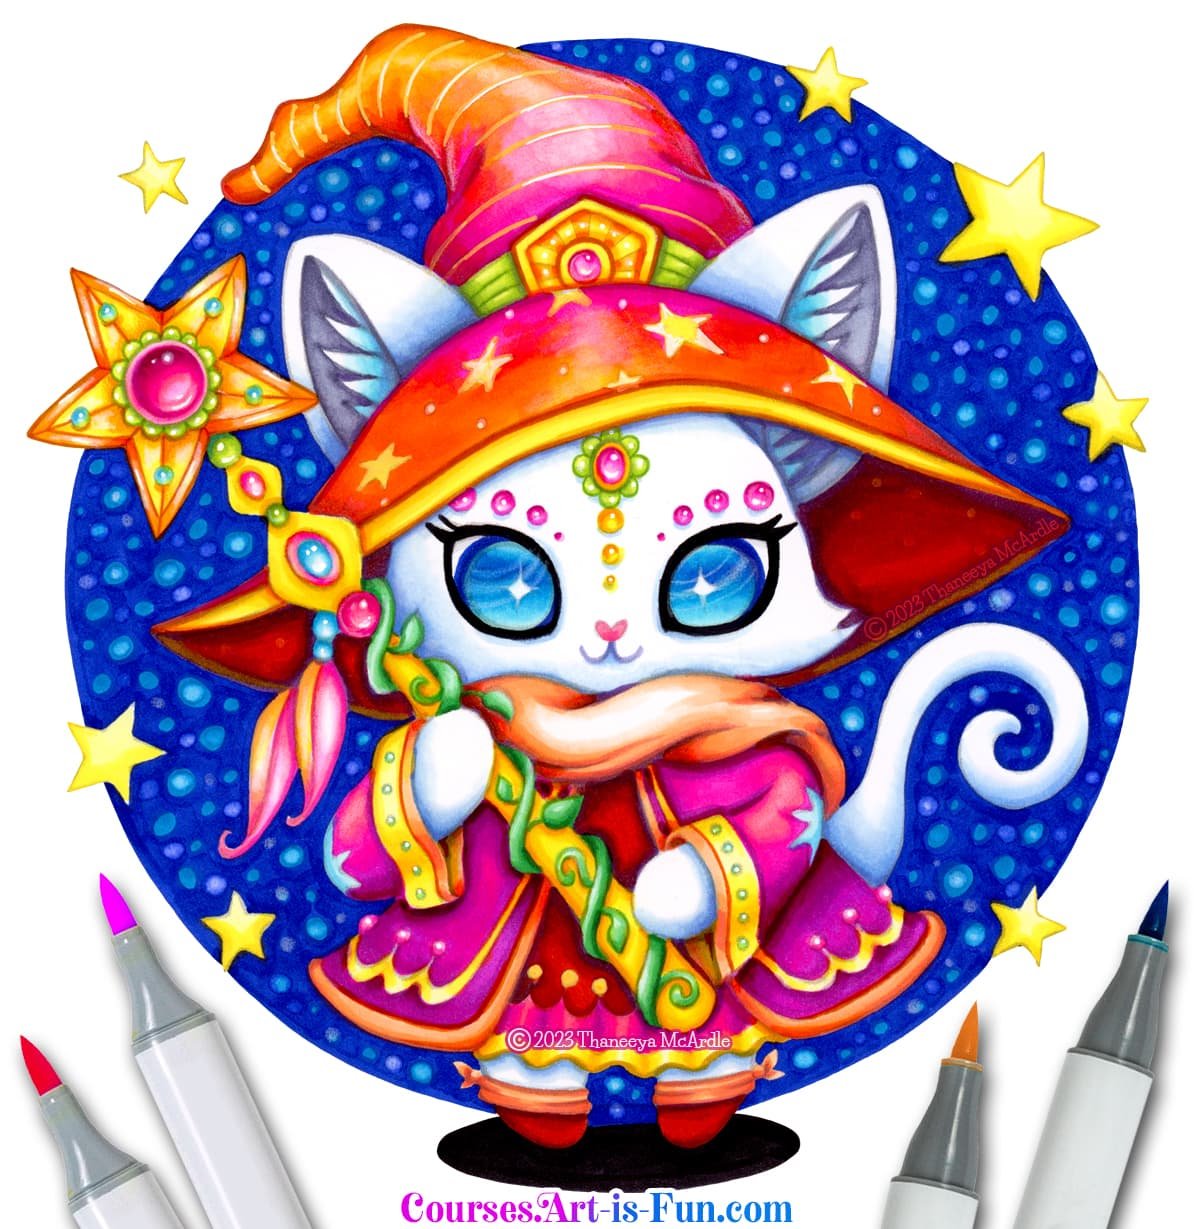
Learn step-by-step how to color in this vibrant wizard cat with Ohuhu Markers!
Above is an artwork that I created for my Wizard Cat Alcohol Markers Course. I printed the line art onto X-Press It Blending Card, which is one of my favorite papers for printing my coloring pages. The Ohuhu markers worked wonderfully on this paper and I was really happy with the results.
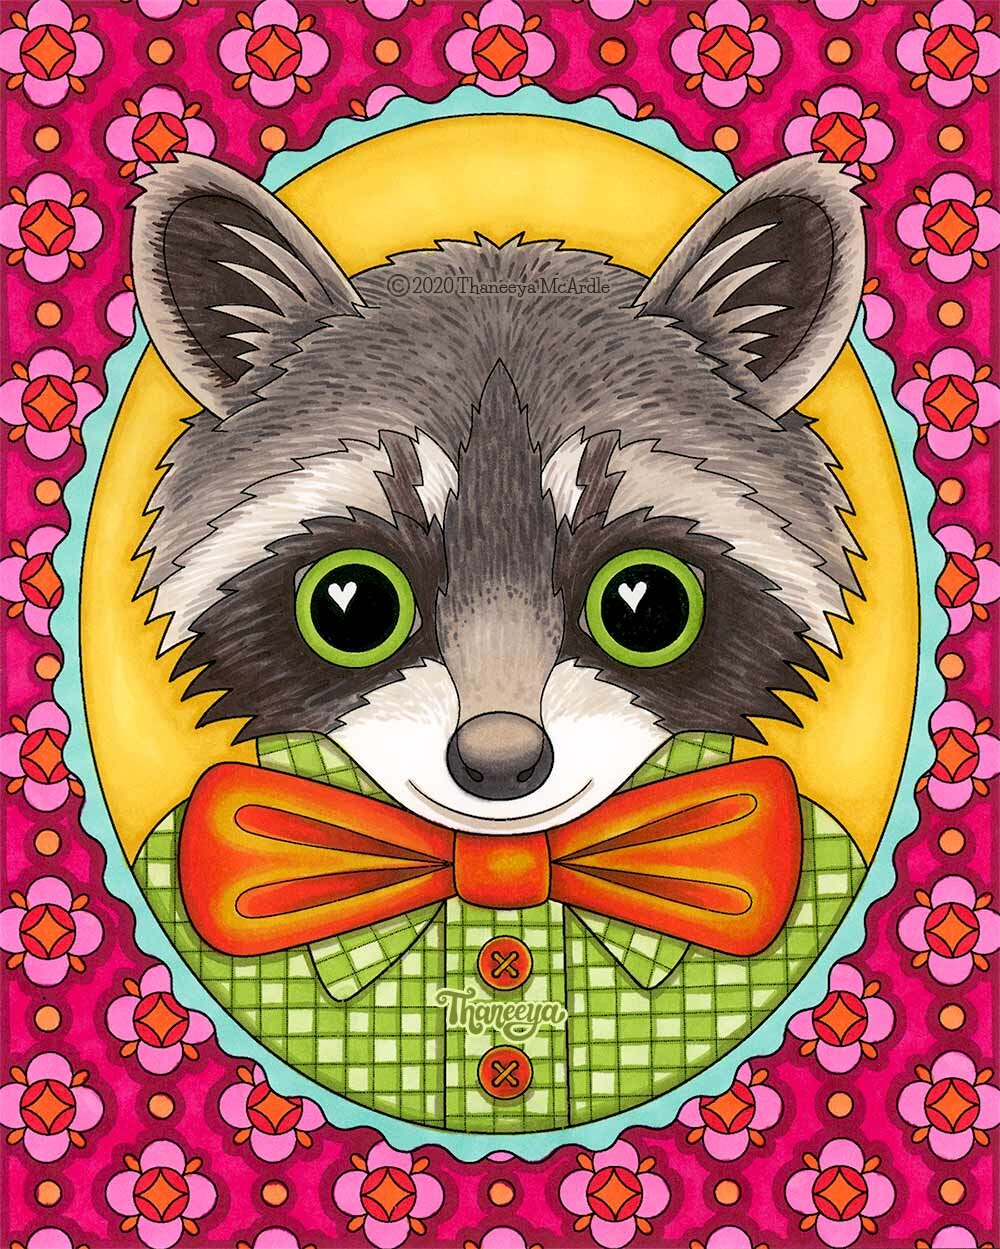
Below is a page from my set of printable Happy Hodgepodge Coloring Pages that I printed onto a sheet of paper that I pulled out of the A4-sized Ohuhu art marker pad. The paper has a similar thickness to cardstock (120lb vs 110lb) and it went through my laser printer just fine. Because it wasn't designed to go through a printer, I did notice that a very small amount of the black ink (toner) came off in certain places if accidentally rubbed by my fingers, but overall that was no big deal. I don't know if that would happen if using an inkjet printer, but it's possible. All in all I was thrilled that the Ohuhu marker paper could run through my printer! If your printer can accept card stock then there's a chance it may be able to handle Ohuhu art marker paper too.
Raccoon coloring page from my set of printable Happy Hodgepodge Coloring Pages, printed onto Ohuhu marker paper and colored with Ohuhu alcohol brush markers
Ohuhu Ink Refills
In June 2023, Ohuhu started offering ink refills! This is exciting because it means you can use your Ohuhu markers over and over. Currently, refills are available for 50 colors, plus the Colorless Blender. You can purchase Ohuhu ink refills directly on their website or on Amazon (affiliate links).
Learn more about Ohuhu Ink Refills, and check out my video to learn how to refill Ohuhu Markers!
If you enjoy my art videos, be sure to subscribe to my channel so that you never miss a thing! 😍
Is Ohuhu a good brand?
After using Ohuhu alcohol brush markers and Ohuhu marker paper these past few years, I can say that I am very enthusiastic about Ohuhu as a reliable brand that offers good quality supplies at an affordable price! I'm impressed by their personable customer service as well as their generous offer that if you receive any markers that are dried out or faulty, they'll be happy to send you a new one.
Are Ohuhu the best art markers for professionals?
The big question is: Are Ohuhu brush markers as good as Copics? Some reviewers claim that they are, but it's worth noting a few things.
As a professional coloring book artist who has sold over 3.9 million coloring books, I’ve colored a lot with alcohol markers over the years. At first blush, the quality of Ohuhu seems quite similar to the quality of Copics. The Ohuhu brush tip feels great and the colors blend pretty well, as you would expect from alcohol markers. One major difference in quality has to do with the brush tip fraying that I mentioned above. Even my most-used Copics hardly have any fraying or tip problems - and that's after several years of heavy use. I mentioned this feedback to a representative at Ohuhu, who replied that they passed the feedback along to their product specialists who will work to make improvements.
When my Copic tips do get a little wonky—which rarely happens—the nibs are replaceable, so I don't have to buy a whole new marker, which saves me money. After 10+ years of owning all 358 of the Copic Sketch Markers, I've only had to replace about 20 or so brush nibs. I'd say that's a pretty amazing track record in favor of Copics!
That said, it is really handy that you can swap around the Ohuhu brush tips (as mentioned earlier), and now, they also sell replacement tips!
Another difference between Copic and Ohuhu is that all of the Copics are refillable, while currently only 50 Ohuhu colors are refillable, plus the Colorless Blender. But Ohuhu plans to make more ink refills available, so stay tuned!) Plus, Ohuhu has recently started offering individual markers for sale on their website, which is a huge perk and makes their alcohol markers an even more attractive option for artists!
As a professional artist who uses alcohol markers regularly, I think Ohuhu markers are a wonderful option for professionals who are on a budget who are just beginning an alcohol marker collection. Now that Ohuhu offers a range of 320 colors, plus replacement nibs and ink refills, along with the ability to purchase markers individually, Ohuhu is now a strong competitor to Copic. While it is handy that Ohuhu marker sets come with cases, I do recommend that you seek out an alternative storage solution—either a marker rack or a marker case with individual slots—to save yourself the time and effort of constantly trying to keep your markers in order, as I mentioned above.
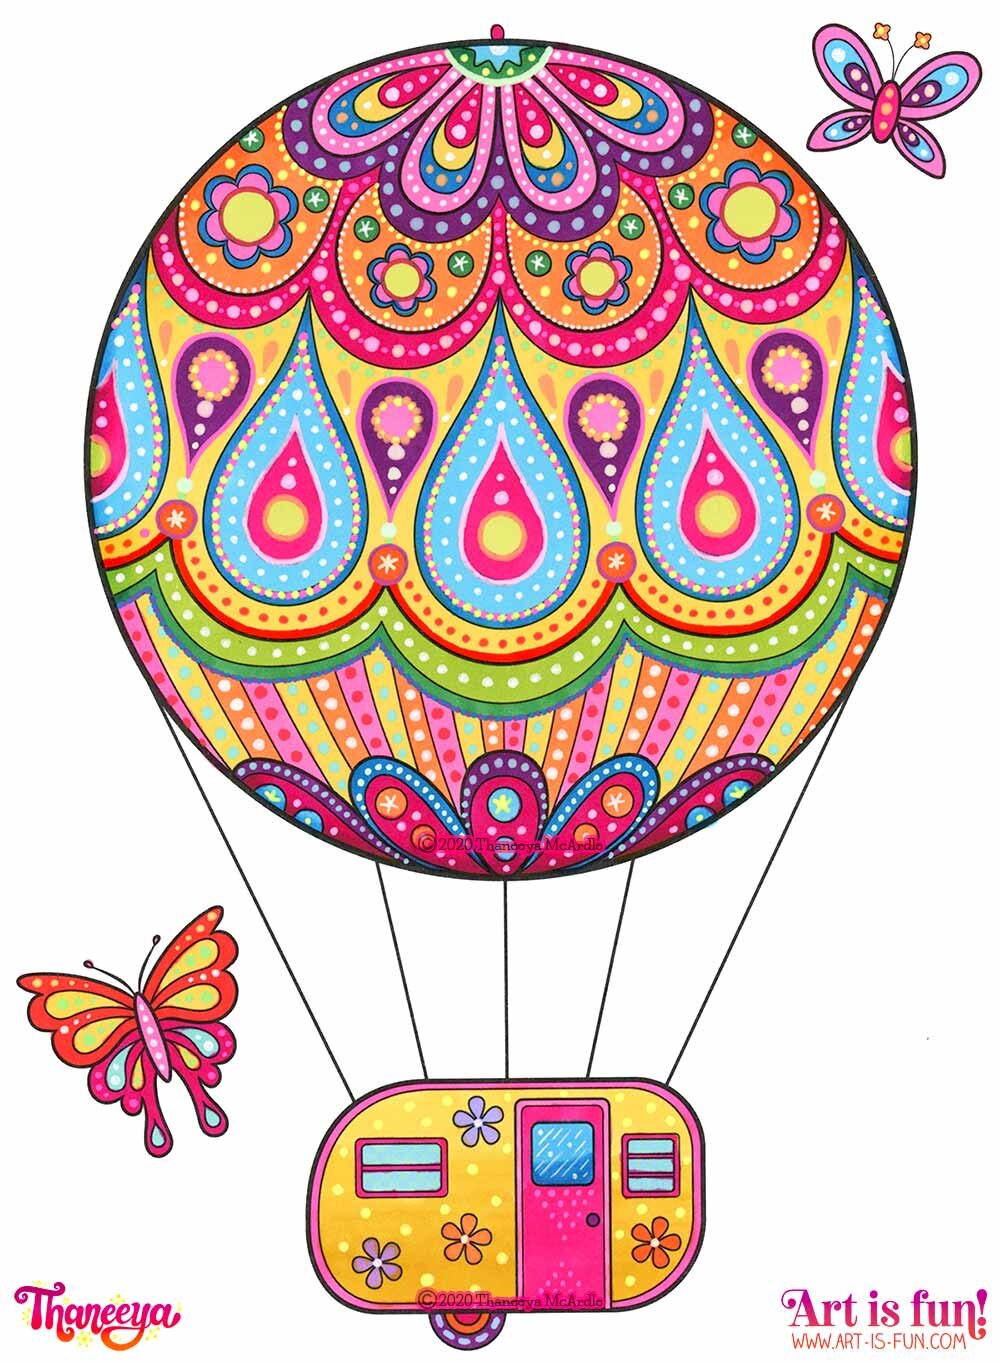
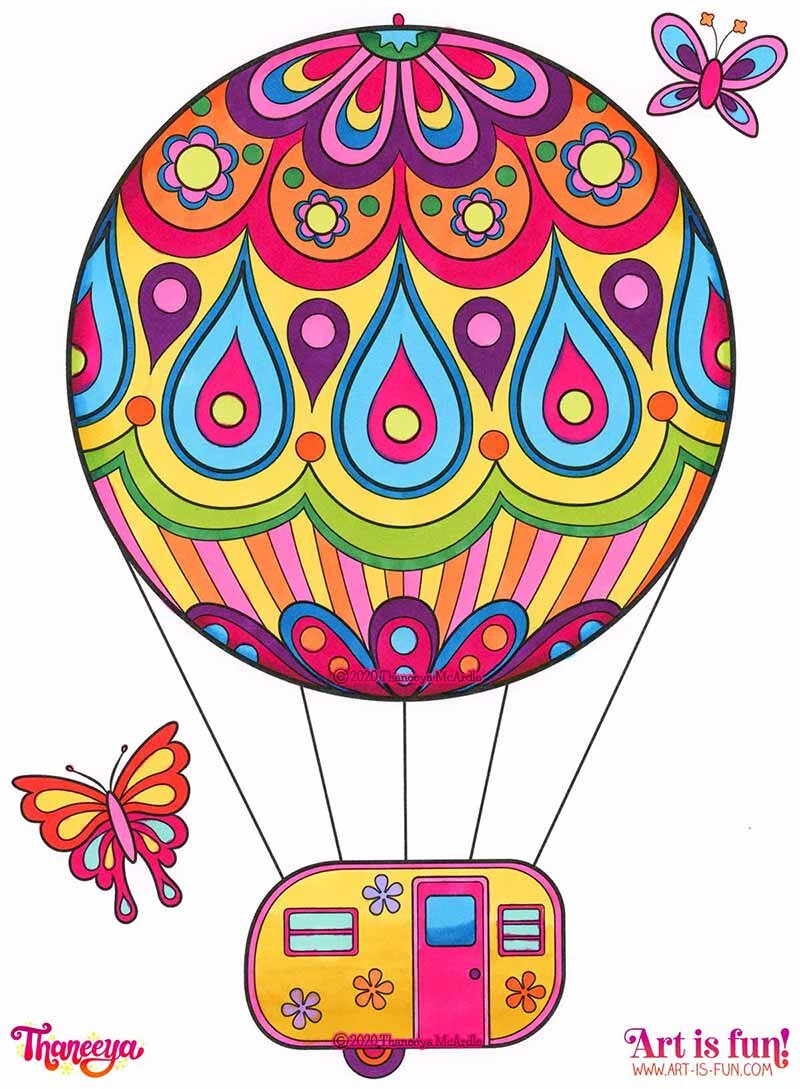
Hot Air Balloon Camper from Thaneeya McArdle’s Happy Campers Coloring Book, colored with Ohuhu alcohol markers and Sakura Gelly Roll Pens
Are Ohuhu markers the best markers for coloring?
Ohuhu markers are fantastic for coloring! If you've never tried brush alcohol markers, Ohuhu markers are a great intro because they show you what these types of markers can do. The brush tip is so versatile, allowing you to color in both tiny details and larger spaces. The brush tip is also great for blending colors to create ombrés and gradients. The colors in this set are beautiful and should be more than enough to satisfy anyone new to coloring with alcohol markers.
Above is a page from my Happy Campers Coloring Book that I colored in with Ohuhu brush markers and then added more detail on top with Sakura Gelly Roll Moonlight Pens. As with all alcohol markers, you can layer gel pens, paint pens and colored pencils on top of Ohuhu markers to add details, texture and shading. Here you can also see how this coloring page looked when it was colored only with the Ohuhu alcohol brush markers, before I added the extra details with gel pens.
As with most alcohol markers, if you're coloring in a page from a coloring book, it's best to either remove the page from the book before you color it in or place a sheet or two of spare paper behind the coloring page to catch any bleed-through that may occur. Some sets of Ohuhu markers even include a handy sheet of clear plastic that you can put behind your paper to prevent bleed-through, which is handy!
Who are Ohuhu markers best suited for?
In summary, Ohuhu markers are perfect for beginners, students, and anyone on a budget. They’re excellent for kids and teens who yearn to try out alcohol markers but whose parents blanche at the premium price of Copics. Also, professional artists like myself—even though I already have the complete set of Copic Sketch Markers—might appreciate having an inexpensive set like this with its handy carrying case, which makes it great for travel or making art outside. You can take these markers to the beach or the park and create art without worrying too much about losing any of your expensive Copics, for example. If the carrying case annoys you because it's hard to keep the markers organized when you use a lot at one time, you could always invest in a marker carrying case that does have individual slots.
The links below take you to these Ohuhu alcohol brush marker sets on Amazon. As an Amazon Associate I earn from qualifying purchases.
Although Ohuhu’s set of 120 alcohol markers is budget-priced compared to most alcohol markers, if it’s still too pricey for your budget, they also offer smaller sets of 48 colors and 72 colors.
Ohuhu also makes other types of art markers, including alcohol markers with dual bullet tips and chisel tips, so if you’re specifically looking for the brush tips that I reviewed in this article, be sure to use my links which will take you directly to the brush markers I’ve reviewed here.
Ohuhu Mega Sets
If you're ready to invest in a whole bunch of Ohuhu brush markers, these three sets are a great way to obtain an instant collection of alcohol markers. The set of 168 markers is a combo of both of the sets I've reviewed on this page: the 120-set and the 48-pastel set. Ohuhu is also offering an even larger set of 216 brush alcohol markers, which includes the 120-set, the 48-set of pastels, and a 48-set of mid-tone colors.
Update: Ohuhu now offers a set of 320 markers! With that many colors at your fingertips, you'll be able to create an impressive range of blends and you'll always be able to find the exact color you're looking for!
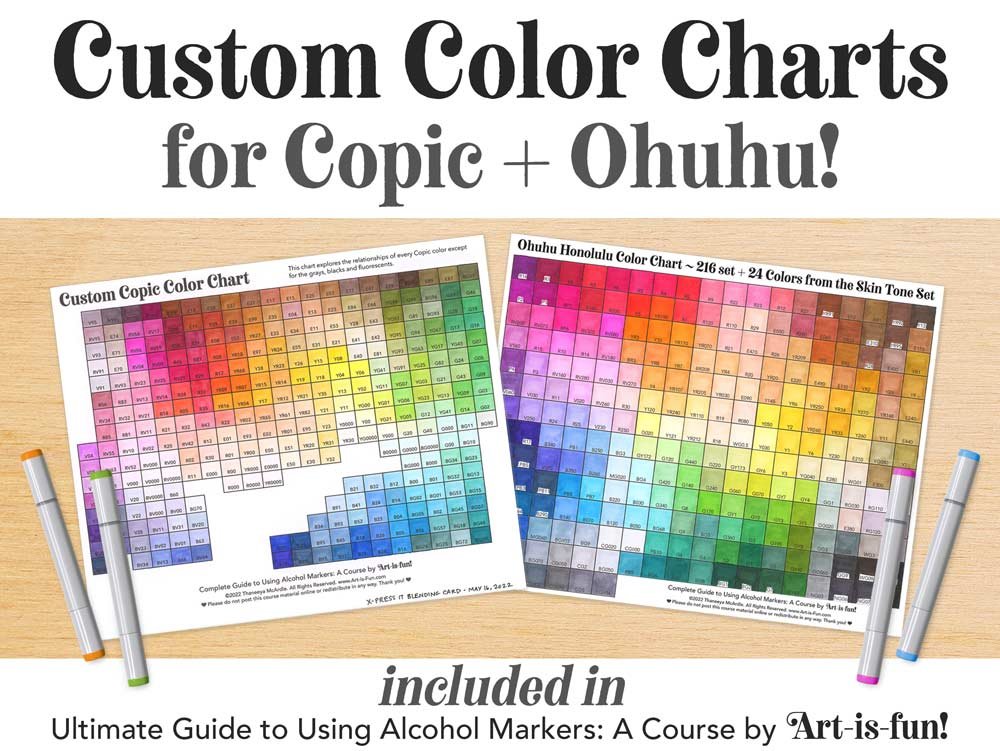
Custom Ohuhu Color Chart
With so many colors to choose from in Ohuhu’s huge set of 320 Honolulu markers, it can be mind-boggling to find the best colors to blend together. To make it easier, I created a custom Ohuhu color chart that organizes the colors chromatically, according to hue, value and saturation! This color chart also includes colors from Ohuhu’s Skin Tone set.
Several months after writing this review, Ohuhu generously sent me their new set of 48 pastel markers (Amazon affiliate link). Rather than write a whole separate review for the pastel markers I decided to add on to the end of this one!
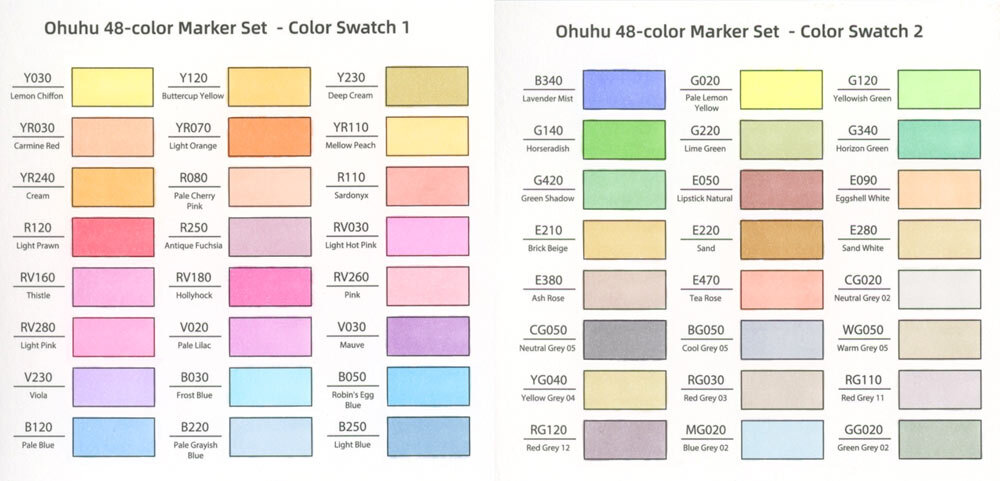
The Ohuhu set of 48 pastel markers are dual-tipped (brush and chisel) alcohol markers just like the other markers I reviewed on this page. What makes this set different is the range of 48 pastel (or "light") colors that fill in some of the color gaps that are missing in their 120-set. This set of markers comes with blank color charts for you to fill in, which is very handy. Here you can see all the colors in this set:
As you can see, this set includes a lovely range of light, bright, pale, pastel hues from every color of the rainbow. Some are actually kind of fluorescent, which is fun. They've also rounded out the collection by including some light greys and pale browns. If you combine this 48-set with the 120-set that I reviewed above, you'll have a nice well-rounded set of 168 markers with a solid range from light to dark across the color spectrum!
The markers come in a zippered carrying case, which is certainly handy for transport, but the lack of internal organization (i.e. individual slots) means that when you pull out a few markers, the remaining markers quickly get jumbled up, making it impossible to keep them in a logical order. Since organization is important to me, I ditched the carrying case and put the markers into an empty Copic marker wallet that has individual slots for storing each marker, which makes it simple to keep everything organized and tidy so that I can quickly find the exact marker I need with minimal fuss. On the whole though, my gripes about the marker case are relatively minor, because some kind of case is certainly better than nothing! If organization is also priority to you, then you can always purchase a new case or tray for storing your markers.
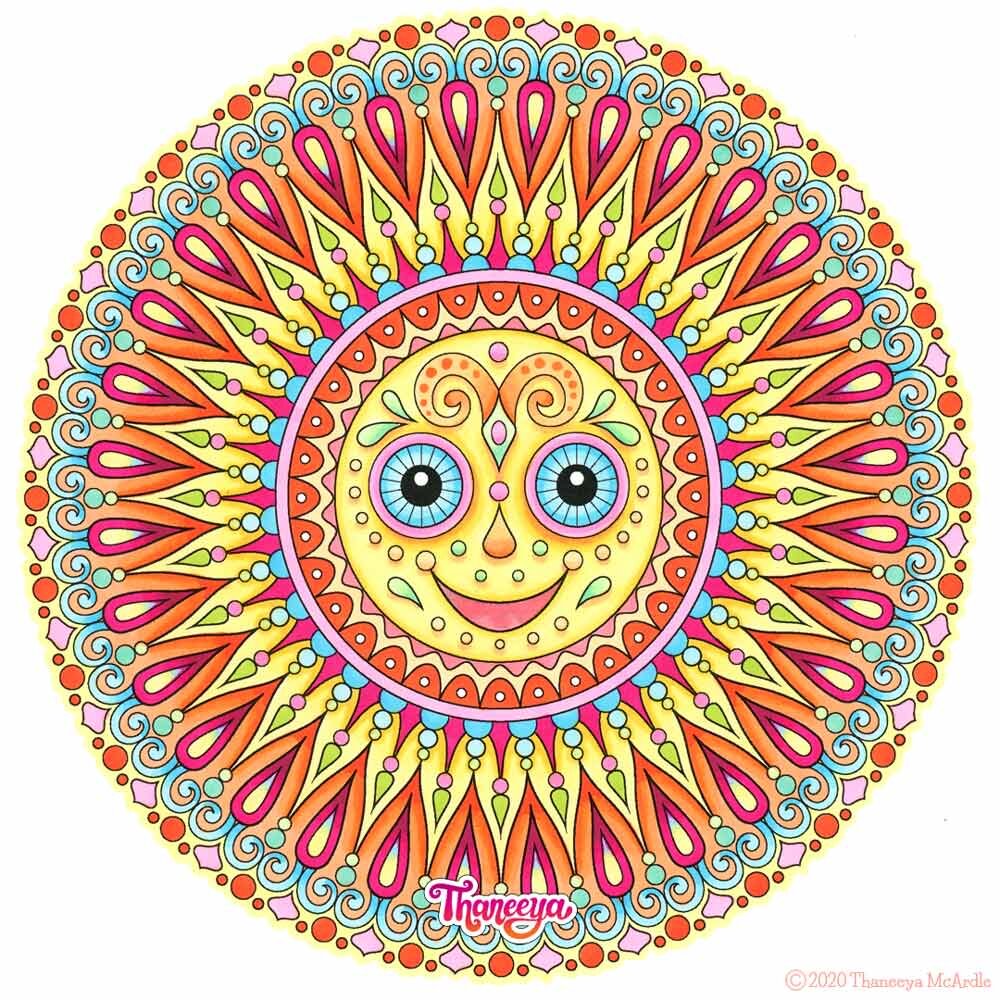
Sun Mandala from Thaneeya McArdle’s set of printable Sun Mandala Coloring Pages
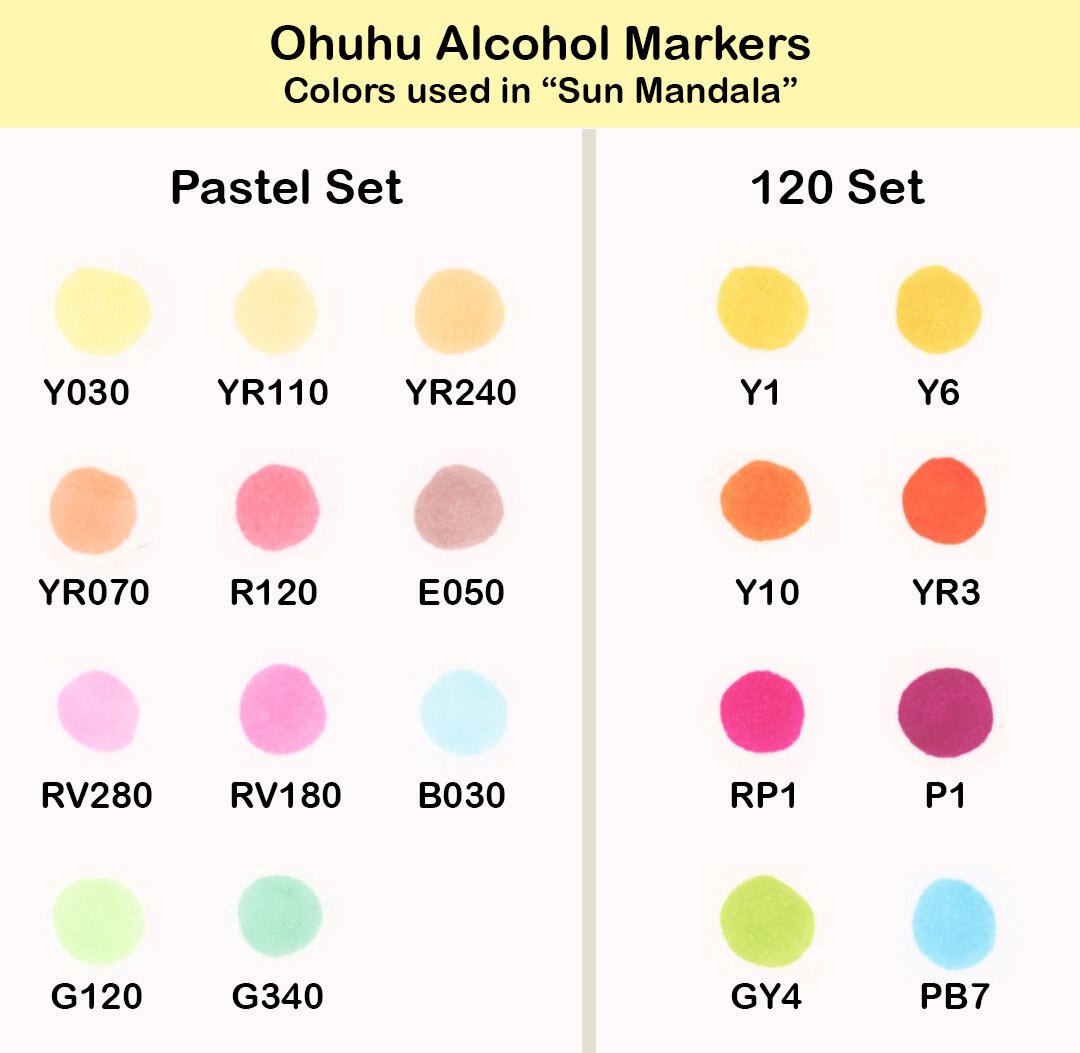
Above is a sun mandala from my set of printable Sun Mandala Coloring Pages that I colored in using 11 markers from the Pastel set and 8 markers from the 120-set. I deliberately chose an illustration that would work well with light, bright colors, but when I tried coloring in the whole sun using just the pastel markers, I quickly concluded that I prefer using a mix of light and dark colors in my artwork. Otherwise, the artwork would feel too pale for my liking. Your style may be different, however, in which case maybe this set of 48 pastel markers might be satisfying to you as is, without needing to supplement with darker colors.
I’ve included a scan that shows the swatches of the specific colors I used to color in this sun mandala, categorized by which set they came from. As you can see, the darker colors from the 120-set help deepen the lighter colors from the Pastel Set, resulting in a richer blend of colors.
Bottom line: Ohuhu's set of 48 pastel markers (Amazon affiliate link) are an excellent set of light colors to complement the 120-set. If you like bright colors you might enjoy these as a standalone set, but for my art/coloring style I find that they work best when used in conjunction with the 120-set which includes a nice variety of deeper, darker colors. Together, both sets provide a solid range of hues that allows you to create nice shading and ombrés! Another affordable, high-quality win from Ohuhu!
Ohuhu Markers Course
In this Ohuhu Markers course you can learn how to color in this adorable Wizard Cat using Ohuhus! 😍 In over 3 hours of narrated video instruction, you’ll learn essential skills like how to blend, create gradients, use the underpainting technique, fix mistakes, and more! Printable line is art provided, so no drawing skills are necessary. I also provide color swatches and names so you can easily follow along!
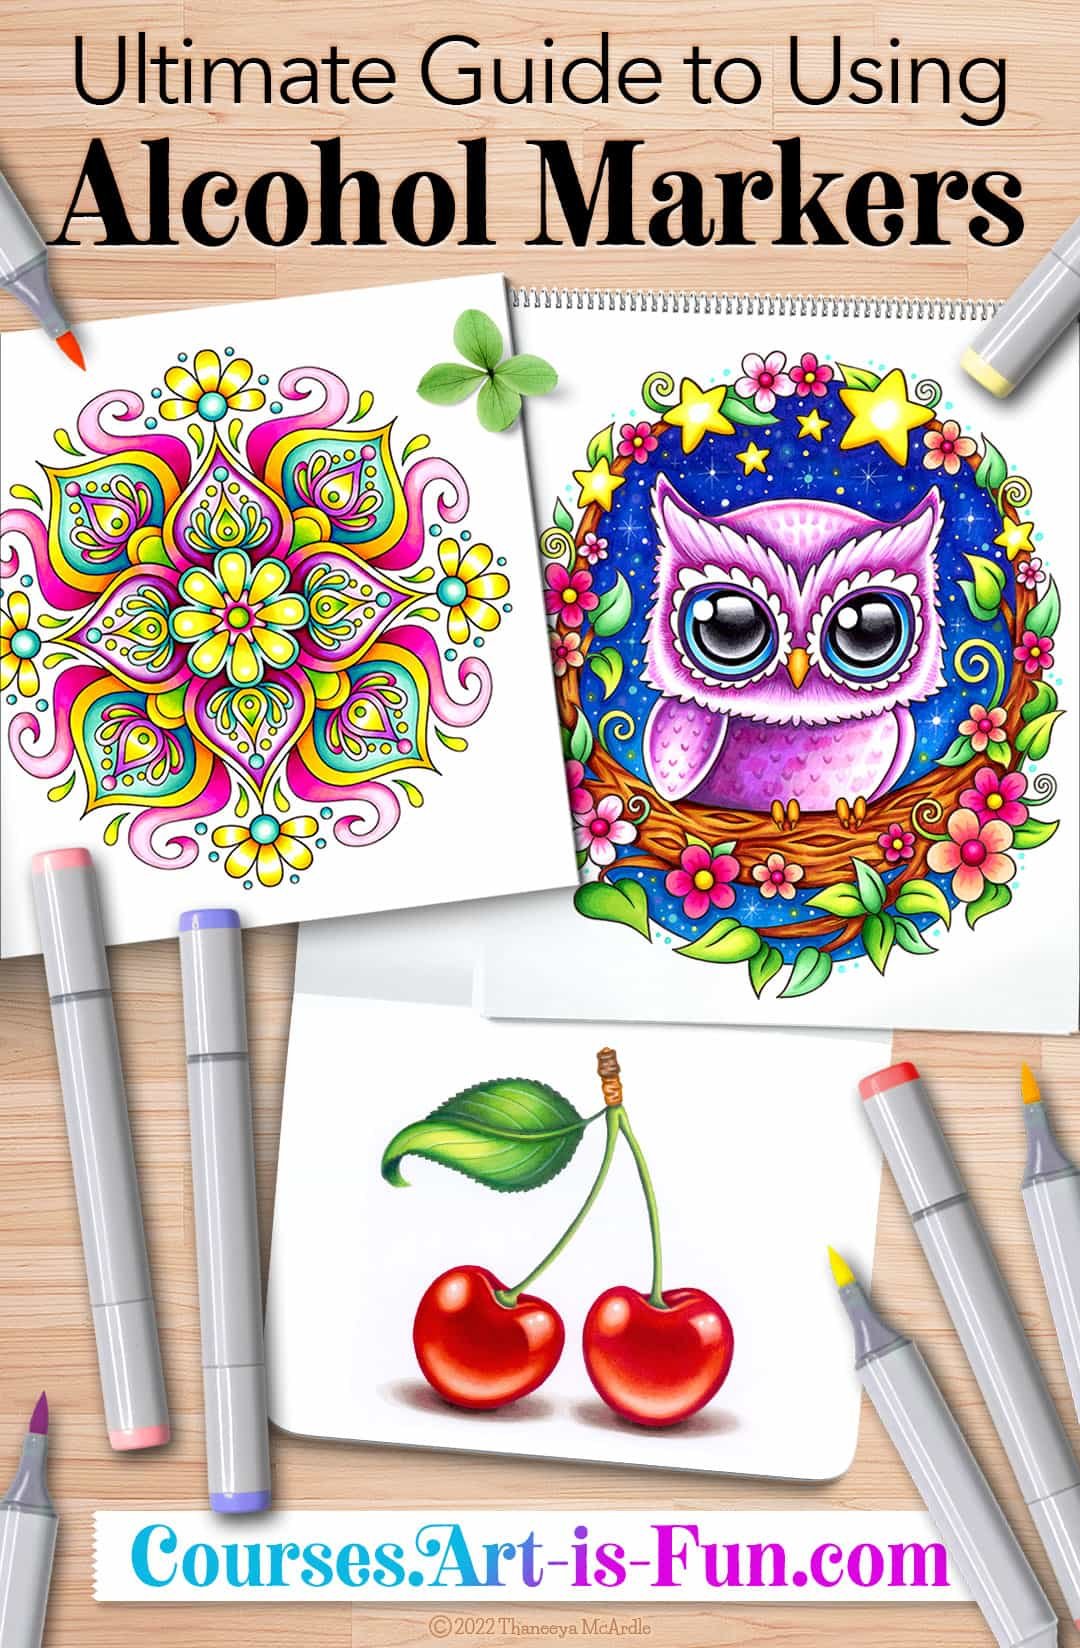
Ultimate Guide to Using Alcohol Markers
Learn how to get the most out of your Ohuhu Markers with my Ultimate Guide to Using Alcohol Markers!
This fun online art course is designed to take you from a complete beginner level to an advanced level! With over 11 hours of instructional video, you’ll go from learning several different blending techniques, along with blending theory, to coloring in the 3 eye-catching artworks below! 😍
Printable line art is included, so you can follow along at your own pace!
In my Ultimate Guide to Using Alcohol Markers, you’ll also get access to my exclusive custom Ohuhu color charts, where I’ve organized the colors based on what they actually look like! This makes it so much easier to choose colors to blend together, saving you valuable time in the long run.
I also provide a Copic-Ohuhu Color Conversion Chart for your convenience!
Keep learning!
Head back to the main Art Markers page to get an overview of this fun medium!
Learn about my Top 5 Alcohol Marker Brands that I love and highly recommend (for all budgets)!
Check out my Alcohol Marker Tutorials, with detailed step-by-step lessons for creating eye-catching art.
Browse my Alcohol Marker Art gallery and get inspired by the possibilities of what you can achieve with this medium!
If you’re interested in markers for coloring and making art, check out my in-depth guide to art markers which will help you understand the different types, learn what they can do, and decide which ones you want to try!
Did this article pique your curiosity about Copics? If so, have a look at my detailed article all about Copic Markers to learn why they’re considered the best of the best when it comes to alcohol markers.
If you’d like to try alcohol markers that have fine tips rather than brush tips, check out my detailed review of Arrtx Markers, which are budget-friendly and available in a wide range of beautiful colors!
If you’re into coloring, you might enjoy this brief article on Tips for Using Alcohol Markers in Coloring Books.
Read more about my favorite coloring supplies and brands - from markers and colored pencils to gel pens and paint pens! I’ve also provided links to where they can be purchased online.

